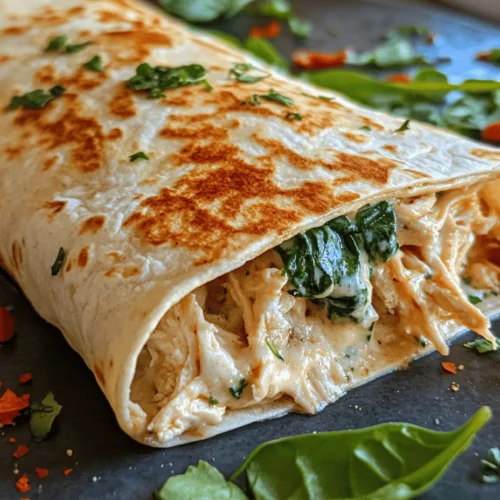
Wraps have become a beloved meal choice for many, and it’s easy to see why. They are not only incredibly versatile but also allow for endless creativity in the kitchen. Whether you’re looking for a quick lunch, a satisfying dinner, or a snack that packs a punch, wraps can do it all. One particular wrap that stands out is the Cheesy Garlic Chicken Wrap, marrying the comforting flavors of garlic and cheese with tender chicken, all neatly tucked into a soft tortilla.
The appeal of Cheesy Garlic Chicken Wraps lies in their delicious flavor profile and their ease of preparation. In just a matter of minutes, you can whip up a meal that the whole family will love. With a combination of creamy cheeses, succulent chicken, and aromatic garlic, these wraps are a delightful way to satisfy your hunger. Perfect for busy individuals or families on the go, this recipe offers a quick solution without sacrificing flavor or nutrition.
Understanding the Ingredients
To create these mouth-watering Cheesy Garlic Chicken Wraps, we need to gather a handful of essential ingredients. Each component plays a vital role in achieving the perfect flavor and texture, making it essential to select high-quality products.
Core Ingredients
1. Chicken
– Chicken serves as the main protein source in this recipe. Opting for lean cuts, such as chicken breast, provides a nutritious option that is low in fat yet high in protein. In addition to its health benefits, chicken absorbs flavors beautifully, ensuring that each bite of the wrap is delicious.
2. Cream Cheese
– Cream cheese adds a rich and creamy texture to the wrap. Its mild flavor complements the chicken and garlic while binding the mixture together. Using full-fat cream cheese will yield a luscious filling, but low-fat alternatives can work if you’re looking to reduce calories.
3. Mozzarella Cheese
– Mozzarella is the star cheese in this wrap, contributing a fantastic melt and stretch. Its mild flavor balances well with the boldness of garlic and the creaminess of the cream cheese, creating an irresistible filling that oozes with flavor.
4. Garlic
– Garlic is a key ingredient that elevates the overall taste of these wraps. Not only does it provide a robust flavor, but it also comes with numerous health benefits, including anti-inflammatory properties and immune support. Fresh garlic cloves are recommended for the best flavor, but pre-minced garlic can be a convenient alternative.
5. Spinach
– Adding spinach not only boosts the nutritional value of the wraps but also provides a fresh contrast to the rich cheese and chicken filling. Spinach is packed with vitamins and minerals, making it a great addition for those looking to incorporate more greens into their meals.
6. Italian Herbs
– A blend of Italian herbs, such as oregano and basil, enhances the flavor profile of the wraps. These herbs add depth and aroma, making every bite a culinary delight.
Nutritional Benefits
Each ingredient in Cheesy Garlic Chicken Wraps contributes to a well-rounded meal. Chicken provides essential amino acids and is a great source of lean protein, aiding muscle repair and growth. The combination of mozzarella and cream cheese not only offers a deliciously creamy texture but also provides calcium and phosphorus for strong bones and teeth. Garlic, known for its potential health benefits, can help support cardiovascular health and boost the immune system. Meanwhile, spinach adds vital nutrients like iron and vitamins A and C, contributing to overall well-being.
Step-by-Step Preparation Guide
Creating Cheesy Garlic Chicken Wraps is not only quick but also a straightforward process. Below is a detailed description of how to prepare this delectable meal.
Prep the Chicken Mixture
To start, begin by preparing the chicken. If you’re using leftover rotisserie chicken or cooked chicken breast, shred the meat into bite-sized pieces. If you’re starting with raw chicken, cook it thoroughly in a skillet or grill until it reaches an internal temperature of 165°F. Once cooled, shred the chicken and place it in a mixing bowl.
Next, add the cream cheese and shredded mozzarella to the chicken. The cream cheese should be softened to room temperature for easy mixing. Using a spatula or fork, combine the ingredients until they are well incorporated. The mixture should be creamy and cohesive, with the chicken evenly coated.
Now, it’s time to enhance the flavor. Add minced garlic to the chicken and cheese mixture, along with a sprinkle of salt, pepper, and your choice of Italian herbs. Seasoning is crucial, as it brings the dish to life and ensures every bite is bursting with flavor. Stir until everything is fully combined, and set the mixture aside while you prepare the tortillas.
Warm the Tortillas
Warming the tortillas is a simple yet essential step in the preparation process. This small detail helps to prevent tearing and improves the overall texture of the wrap. To warm the tortillas, you can use a skillet over medium heat for about 30 seconds on each side or microwave them for 10-15 seconds, just until they are pliable.
Assemble the Wraps
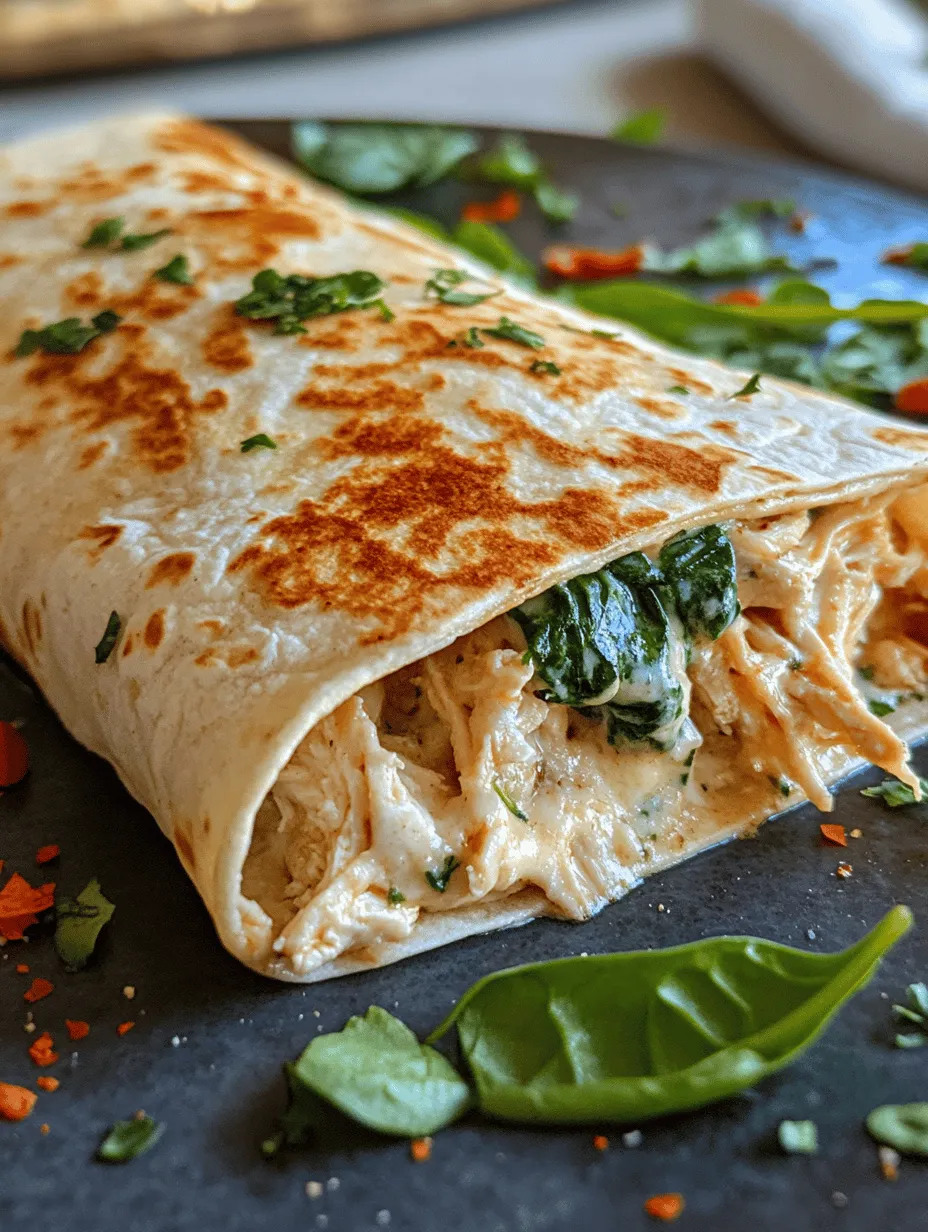
Now comes the fun part: assembling your Cheesy Garlic Chicken Wraps! Lay a warmed tortilla flat on a clean surface. Spoon a generous amount of the chicken and cheese mixture onto the center of the tortilla, ensuring you don’t overfill, which could lead to messy wraps.
To fold the wrap, start by folding in the sides of the tortilla over the filling. Next, roll the bottom edge of the tortilla tightly over the filling, tucking it in as you go. Continue rolling until the wrap is fully enclosed. Repeat this process with the remaining tortillas and filling until you have a delicious stack of Cheesy Garlic Chicken Wraps ready to be enjoyed.
In the next part of this article, we will dive into the cooking methods and tips for achieving the perfect golden-brown finish on your wraps, as well as some serving suggestions and variations to customize your meal. Stay tuned!
Step-by-Step Guide to Assembling the Wraps
Assembling your Cheesy Garlic Chicken Wraps is a simple yet crucial step that determines the overall success of your dish. To ensure that every bite is packed with flavor and that the wraps hold together beautifully, it’s important to follow these steps carefully.
Portion Control and Ingredient Placement
1. Prepare Your Ingredients: Before you start assembling, ensure that all your ingredients are prepped and ready. This includes your cooked chicken, cheese, garlic, and any additional veggies you wish to add.
2. Lay Out the Wrap: Start with a large tortilla or wrap. Place it flat on a clean, dry surface. A larger wrap allows for more filling without bursting when rolled.
3. Add the Chicken: Begin by placing a generous scoop of the chopped garlic chicken in the center of the wrap. Aim for about 1/4 of the wrap’s diameter to avoid overfilling. This ensures you have enough room to roll without spilling.
4. Layer the Cheese and Veggies: Sprinkle a handful of shredded cheese over the chicken, followed by any additional ingredients like spinach, bell peppers, or onions. Distributing the ingredients evenly will help maintain balance in each bite.
5. Season: If you desire, you can sprinkle a pinch of salt, pepper, or any additional herbs at this stage for added flavor.
Wrap It Up
Now that your ingredients are in place, it’s time to roll the wrap into a delicious package.
1. Fold the Sides In: Start by folding the left and right edges of the tortilla inward over the filling. This will help keep the fillings from spilling out as you continue to roll.
2. Roll Tightly: With your sides tucked in, begin rolling from the bottom (the edge closest to you) upwards, holding the filling in place. Apply gentle pressure as you roll to ensure everything stays compact.
3. Seal the Wrap: Once fully rolled, you can use a bit of cream cheese or a smear of sour cream to seal the edge of the wrap. This helps keep it closed during cooking and adds a creamy texture.
Techniques for Properly Folding and Rolling the Wraps
The way you fold and roll your wraps can make a significant difference in their integrity.
– Tightness Matters: Ensure that your wraps are rolled tightly without being overly squished. A loose wrap may fall apart while toasting or serving.
– Use the Right Tortilla: Flour tortillas are usually more pliable compared to corn tortillas, making them an excellent choice for wraps. However, if you prefer whole grain or gluten-free options, they work too—just ensure they are fresh to maintain flexibility.
Toast the Wraps
Toasting your wraps is an essential step that enhances both texture and flavor. Here’s how to achieve that perfect golden-brown finish.
1. Preheat Your Pan: Use a non-stick skillet or a grill pan. Preheat it over medium heat. This will create a nice sear on the outside of the wrap without burning.
2. Add Oil or Butter: Lightly grease the pan with olive oil or butter. This not only prevents sticking but also helps achieve that desirable crispness.
3. Toast the Wrap: Place the rolled wraps seam-side down onto the pan. Cook for about 2-3 minutes on each side, depending on the heat of your stove. You are looking for a beautiful golden-brown crust.
4. Flip Carefully: Use a spatula to flip the wraps gently. If you notice the bottom is browning too quickly, lower the heat to allow the inside to warm through without burning the exterior.
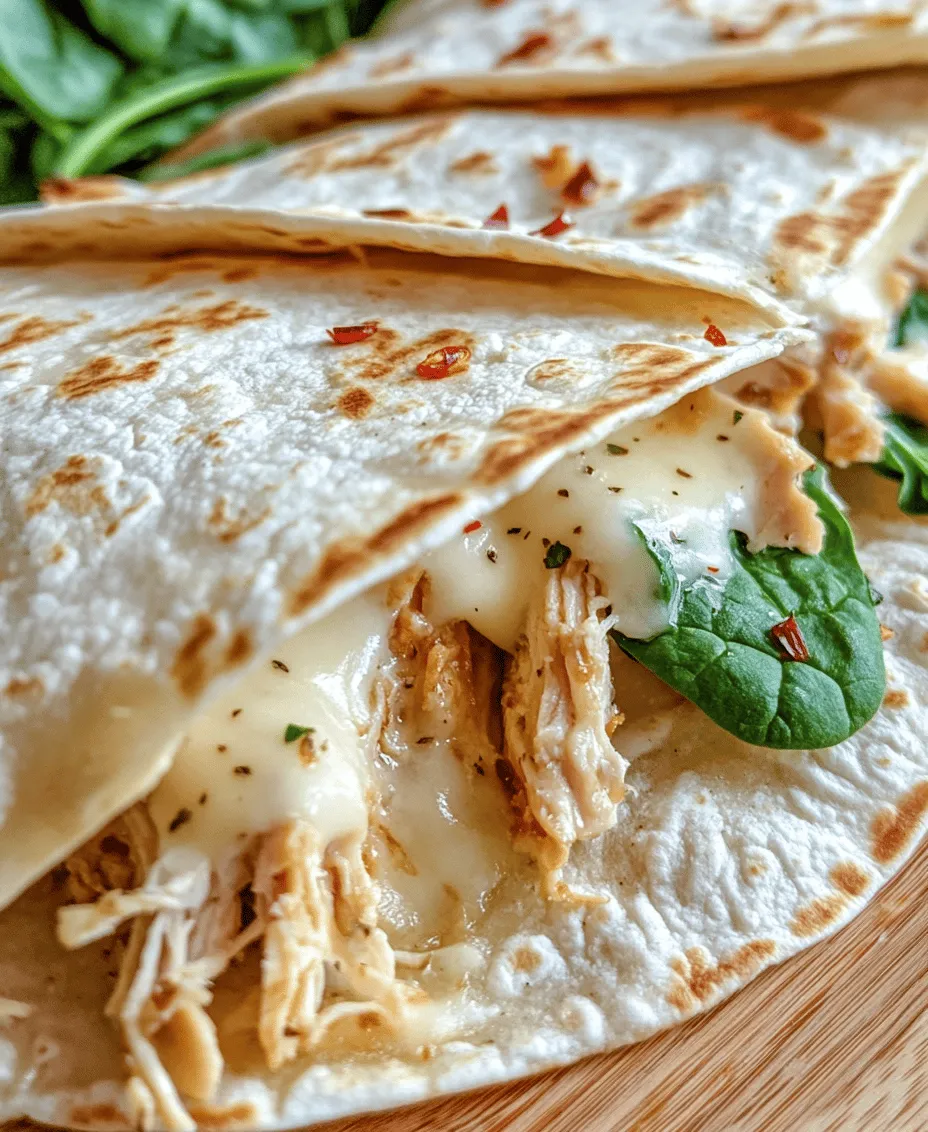
5. Check for Melting: If you want the cheese to be extra melty, cover the pan with a lid for the last minute of cooking. This traps heat and helps melt the cheese perfectly.
Serving Suggestions
Once your Cheesy Garlic Chicken Wraps are toasted to perfection, it’s time to think about how to serve them.
Dipping Sauces
Pairing your wraps with a delicious dipping sauce can elevate your meal. Here are some popular choices:
– Ranch Dressing: Creamy ranch provides a cool contrast to the savory flavors of the chicken and cheese.
– Marinara Sauce: A classic pairing, marinara adds a tangy tomato flavor that complements the garlic perfectly.
– Honey Mustard: A sweet and tangy option that pairs well with the richness of the cheese.
Side Dishes
Consider serving your wraps with:
– Fresh Salad: A crisp salad with mixed greens, cherry tomatoes, and a light vinaigrette can balance the richness of the wraps.
– Vegetable Sticks: Carrot, cucumber, or bell pepper sticks add crunch and freshness to your meal.
– Potato Wedges: For a heartier side, crispy potato wedges seasoned with herbs can be a delightful addition.
Plating and Presentation
To enhance the dining experience, consider how you plate your wraps. Arrange them on a large platter, cut them in half diagonally to showcase the melted cheese and vibrant filling, and serve alongside your chosen dipping sauces in small bowls.
Customizing Your Wraps
One of the best things about Cheesy Garlic Chicken Wraps is their versatility. Here are some ways to customize them based on dietary preferences and personal tastes.
Dietary Variations
– Vegetarian Option: Substitute the chicken with grilled vegetables, tofu, or chickpeas for a hearty vegetarian wrap. Add extra cheese or a creamy avocado spread for richness.
– Gluten-Free Option: Use gluten-free tortillas made from almond flour or rice flour. Ensure all ingredients, like sauces and cheeses, are gluten-free as well.
Extra Ingredients
Consider adding these extra ingredients for a flavor boost:
– Bell Peppers: Sautéed or raw, they add a crunchy texture and sweetness.
– Onions: Caramelized onions bring a deep, rich flavor that complements the garlic.
– Different Cheeses: Experiment with mozzarella, cheddar, feta, or pepper jack for varying flavor profiles.
Creative Spice Additions
To spice things up, consider incorporating:
– Chili Flakes: A sprinkle of chili flakes can add a nice kick.
– Fresh Herbs: Basil, cilantro, or parsley can brighten up the flavors.
– Garlic Powder: For those who can’t get enough garlic, a dash of garlic powder can amplify the dish.
Storage and Reheating Tips
Leftovers are always a great option for busy days. Here’s how to store and reheat your wraps for maximum freshness and flavor.
Best Practices for Storing Leftovers
1. Cool Completely: Allow your wraps to cool to room temperature before storing them to prevent condensation, which can lead to sogginess.
2. Wrap Properly: Use plastic wrap or aluminum foil to tightly wrap each individual wrap. This keeps them from drying out.
3. Refrigerate: Store in the refrigerator for up to 3 days, or freeze for up to 2 months. Just make sure to label them with the date.
Methods for Reheating
1. Microwave: For a quick option, microwave the wrap for about 30 seconds to 1 minute. However, this may result in a softer texture.
2. Skillet: For the best results, reheat in a skillet over medium heat for about 2-3 minutes on each side. This will help restore the crispiness.
3. Oven: Preheat the oven to 350°F (175°C) and place the wraps on a baking sheet. Heat for about 10-15 minutes or until warmed through.
Conclusion
Cheesy Garlic Chicken Wraps are not only a delicious and satisfying meal option, but they also offer incredible versatility for customization. With the ability to adapt the recipe to fit various dietary needs and preferences, these wraps can cater to everyone at your table. Whether you enjoy them as a quick weekday dinner or a fun meal to share with family and friends, they promise to deliver a burst of flavor and comfort.
So, gather your ingredients and give this recipe a try. Don’t hesitate to explore personal variations and make it your own. Cooking is all about creativity and joy, and sharing meals with loved ones is one of the greatest pleasures in life. Enjoy every bite!