
Introduction
Pizza is more than just a meal; it’s a global phenomenon that transcends borders and brings people together. From the bustling streets of Naples to the pizzerias of New York City, pizza has carved its place in food culture, becoming a beloved dish enjoyed by millions. While frozen and delivery options are convenient, nothing compares to the mouthwatering experience of biting into a slice of pizza made with homemade dough. This is where artisan pizza dough comes into play, elevating your pizza-making game to new heights.
Artisan pizza dough is known for its unique qualities, including a chewy texture and complex flavor profile achieved through careful fermentation and high-quality ingredients. Unlike standard pizza dough, which can often be bland and rubbery, artisan dough is crafted with love and attention, resulting in a crust that is crisp on the outside and delightfully chewy on the inside. The journey to creating the perfect artisan pizza dough begins at home, where you can control every aspect of the process, ensuring that your pizza is not only delicious but also tailored to your tastes.
In this article, we aim to provide a comprehensive guide to making perfectly chewy artisan pizza dough. Whether you’re a seasoned home cook or a novice in the kitchen, our step-by-step instructions will help you master the art of pizza dough preparation. By the end, you’ll be equipped with the knowledge to create your very own artisan pizza dough, paving the way for countless pizza nights filled with creativity and flavor.
Understanding the Ingredients
Before diving into the recipe, it’s essential to understand the key ingredients that contribute to the success of your artisan pizza dough. Each component plays a vital role in achieving the desired texture and flavor, so let’s break them down.
Bread Flour
At the heart of any great pizza dough is the flour, and for artisan pizza, bread flour is the best choice. Bread flour is made from hard wheat, which contains higher protein content compared to all-purpose flour. This increased protein level is crucial for gluten development, which ultimately gives the dough its strength and chewiness. Gluten is a network of proteins that forms when flour is mixed with water and kneaded, allowing the dough to trap gases released by yeast during fermentation. The result is a crust that is both airy and resilient, able to hold up under the weight of your favorite toppings.
Warm Water
Water is another indispensable ingredient in the creation of pizza dough. Warm water is used to activate the yeast, allowing it to ferment and produce carbon dioxide, which causes the dough to rise. The ideal temperature for water is around 100°F to 110°F (38°C to 43°C). This warmth encourages yeast activity without killing it, ensuring a successful fermentation process. Additionally, the water hydrates the flour, creating the necessary conditions for gluten formation.
Active Dry Yeast
Yeast is the magical ingredient that brings pizza dough to life. Active dry yeast is a type of leavening agent that ferments sugars in the dough, producing carbon dioxide gas. This gas gets trapped in the gluten structure, causing the dough to rise and develop its airy texture. Using fresh, high-quality yeast is crucial for achieving the best results. You can confirm the yeast is viable by proofing it in warm water with a bit of sugar; if it becomes foamy and bubbly after a few minutes, it’s ready to go.
Sea Salt
While often overlooked, salt is a critical component in pizza dough. Sea salt not only enhances the flavor of the dough but also plays a role in controlling fermentation. Salt regulates yeast activity, preventing it from working too quickly and allowing for a more complex flavor to develop during the longer fermentation process. Incorporating salt into your dough will result in a well-balanced and flavorful crust that complements your toppings beautifully.
Optional Ingredients
While the core ingredients mentioned above are essential for artisan pizza dough, there are optional ingredients that can enhance flavor and texture. For instance, adding a tablespoon of olive oil can introduce a subtle richness and improve the dough’s extensibility, making it easier to stretch. Additionally, a pinch of sugar can be added to help activate the yeast more effectively, although it’s not strictly necessary if your yeast is fresh.
The Science Behind Pizza Dough
Understanding the science behind pizza dough can significantly improve your results and give you insight into the fermentation process. When yeast is added to the dough, it begins to consume sugars and produce carbon dioxide and alcohol as byproducts. This fermentation process is crucial for developing the flavors and textures we associate with artisan pizza crust.
During fermentation, gluten formation is also occurring. As you knead the dough, the proteins in the flour bond together, creating an elastic network that gives the dough its structure. The more you knead, the stronger the gluten network becomes, leading to a chewier texture. The key is to strike a balance; over-kneading can lead to tough dough, while under-kneading can result in a fragile structure.
Temperature plays a vital role in the fermentation process. Yeast is most active at warm temperatures, but if the dough gets too hot, it can kill the yeast, leading to flat, dense crusts. On the other hand, cooler temperatures slow down yeast activity, allowing for longer fermentation times and more complex flavors. Many artisan pizza makers utilize a cold fermentation method, where the dough is refrigerated for an extended period (up to 24-72 hours) to develop deeper flavors.
Step-by-Step Instructions for Artisan Pizza Dough
Now that we have a solid understanding of the ingredients and the science behind pizza dough, it’s time to roll up our sleeves and get started. Below are the detailed steps to prepare your artisan pizza dough.
Preparing the Yeast Mixture
The first step in making artisan pizza dough is to prepare the yeast mixture. To do this, measure out 1 cup (240 ml) of warm water and pour it into a mixing bowl. To activate the yeast effectively, add 2 teaspoons of sugar to the warm water and stir gently. Next, sprinkle 2 ¼ teaspoons of active dry yeast over the surface of the water and let it sit for about 5-10 minutes. During this time, the yeast will begin to foam and bubble, indicating that it is active and ready to use. If there are no bubbles after 10 minutes, you may need to start over with fresh yeast.
Mixing the Dry Ingredients
While the yeast is activating, you can prepare the dry ingredients. In a large mixing bowl, combine 3 ½ cups (440 g) of bread flour and 2 teaspoons of sea salt. Using a whisk, mix the flour and salt together thoroughly to ensure even distribution. This step is crucial, as it allows the salt to be evenly incorporated into the dough, leading to a more flavorful crust.
Once the dry ingredients are well combined, create a well in the center of the flour mixture. This well will serve as a reservoir for the yeast mixture, making it easier to combine the wet and dry ingredients without creating too much mess.
Bringing the Dough Together
With your dry ingredients prepped and the yeast mixture activated, it’s time to bring the dough together. Pour the activated yeast mixture into the well you created in the flour. Using a wooden spoon or your hands, gently mix the flour into the liquid, gradually incorporating the flour from the edges of the well. At first, the mixture will appear shaggy and rough, but as you continue to mix, it will begin to come together into a cohesive dough.
As the dough starts to form, you may notice that it is slightly sticky. This is normal; resist the urge to add more flour at this stage, as doing so can lead to a dry dough. Instead, keep mixing until the dough has formed a ball and is pulling away from the sides of the bowl.
Kneading the Dough
Once the dough has come together, it’s time to knead. Lightly flour your work surface and turn the dough out onto it. Begin kneading the dough by pressing it down with the heel of your hand, then folding it over itself, and repeating the process. Knead the dough for about 8-10 minutes, or until it becomes smooth and elastic. You can tell the dough is ready when it springs back after being pressed with your finger and has a slightly tacky texture.
Kneading is not just about developing gluten; it’s also an opportunity to incorporate any optional ingredients, such as olive oil if you choose to use it. If you decide to add olive oil, drizzle it onto the dough halfway through kneading, allowing it to mix thoroughly.
This marks the beginning of your journey to crafting the perfect artisan pizza dough. Stay tuned for the next part, where we will cover additional steps, including fermentation, shaping, and baking techniques that will help you create a pizza that rivals your favorite pizzeria.
Steps to Knead Effectively
Kneading is a crucial step in developing the gluten structure that gives artisan pizza dough its characteristic chewy texture. To knead effectively, start with your dough placed on a clean, lightly floured surface. Use the heels of your hands to push the dough away from you, then fold it back over itself. Rotate the dough a quarter turn, and repeat this process for about 8 to 10 minutes. It’s important to maintain a consistent rhythm to ensure even gluten development.
You’ll know the dough is ready when it becomes smooth and elastic. The ideal dough should spring back slightly when you poke it with your finger, indicating that enough gluten has formed to provide structure. If the dough is still sticky and does not hold its shape, continue kneading for an additional minute or two.
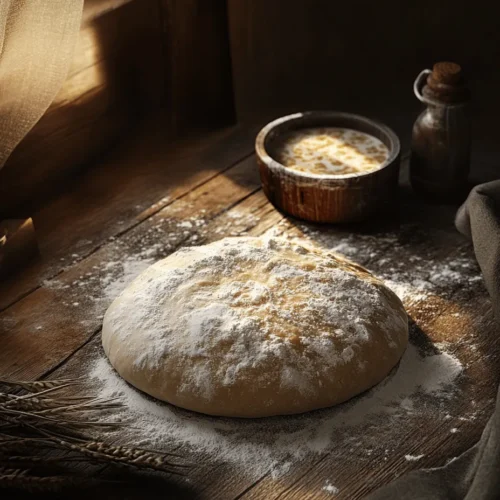
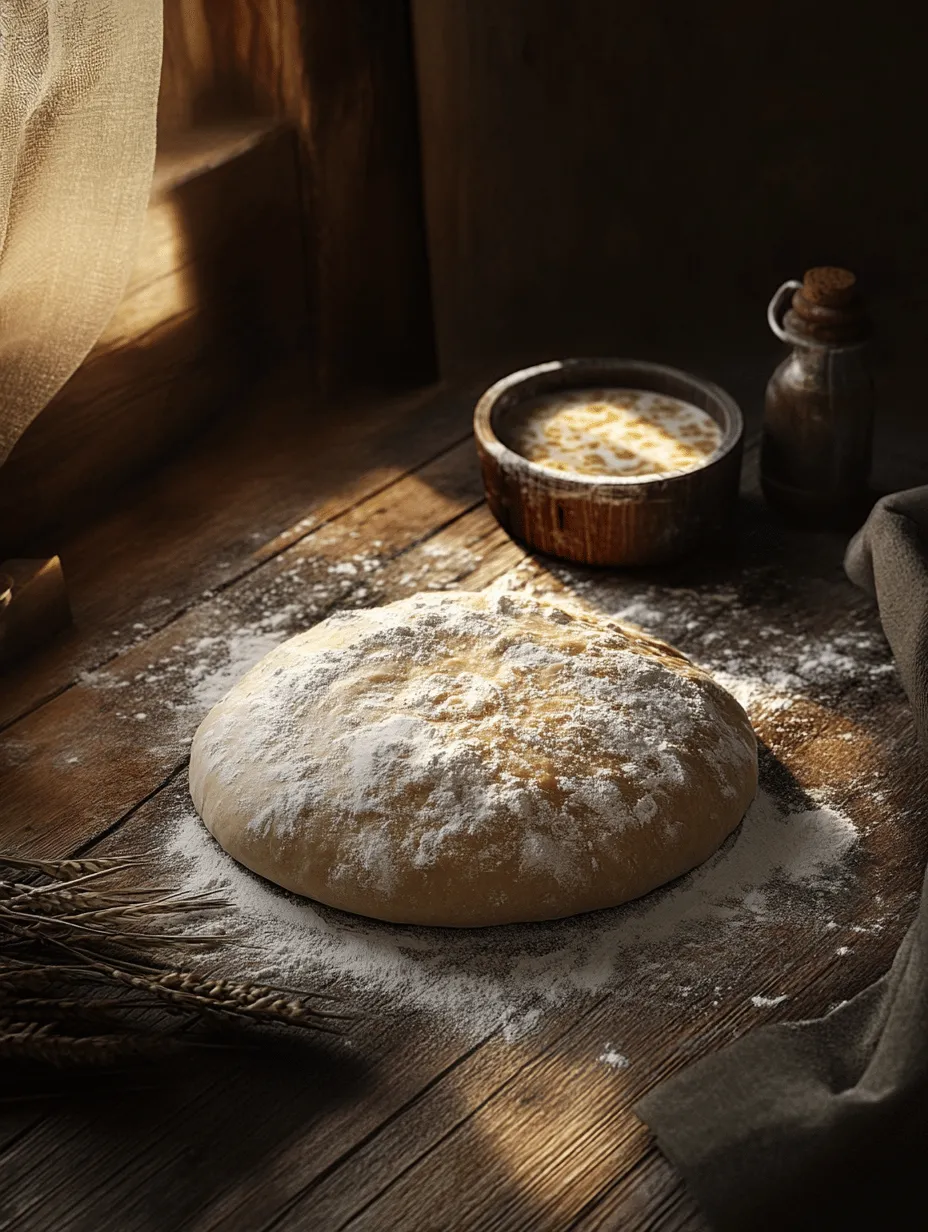
First Rise
After kneading, it’s time for the first rise. This step allows the yeast to ferment and produce gas, which will help the dough to rise and develop flavor. Transfer your kneaded dough into a large, greased bowl, turning it to coat the surface with oil. This prevents it from drying out.
Cover the bowl with a clean kitchen towel or plastic wrap, and place it in a warm, draft-free environment. Ideal rising temperatures are between 75°F to 80°F. If your kitchen is cool, consider placing the bowl in an oven turned off but with the light on, which can create a warm atmosphere.
The dough should rise until it has doubled in size, which typically takes about 1 to 2 hours. To check if it has risen adequately, gently press your finger into the dough; if the indentation remains and does not spring back, it’s ready for the next step.
Shaping and Dividing the Dough
Once your dough has risen, it’s time to shape and divide it. Gently punch down the dough to release the excess air, which also helps to redistribute the yeast and sugar. This step is essential as it keeps the dough from becoming too dense.
Next, transfer the dough to a lightly floured surface. Using a bench scraper or a sharp knife, divide the dough into equal portions based on the size of pizzas you wish to make. For standard 12-inch pizzas, each portion should weigh approximately 8 ounces. To ensure uniformity, weigh the portions using a kitchen scale if available.
Second Rise
After dividing the dough, shape each piece into a ball by folding the edges into the center and rolling it gently on the work surface to form a smooth surface. Place the shaped dough balls on a floured sheet tray or in a greased container, ensuring they are spaced apart. Cover them loosely with a damp cloth or plastic wrap.
Allow the dough to rise again for about 30 minutes to 1 hour. This second rise is crucial as it gives the gluten network time to relax, making the dough easier to stretch without tearing. The dough should puff up slightly but doesn’t need to double in size again.
Prepping for Baking
Before you begin baking, preheat your oven to the highest setting, typically around 475°F to 500°F. If you have a pizza stone, place it in the oven to heat as well; this will help achieve a crispy crust.
When it’s time to shape your pizza, take one dough ball and place it on a lightly floured surface. Using your fingers, gently press the dough into a flat disc. Starting from the center, work your way outwards, allowing the outer edges to remain thicker for a nice crust. You can also use a rolling pin to achieve your desired thickness, but remember that rolling can compress the air bubbles, so handle the dough gently.
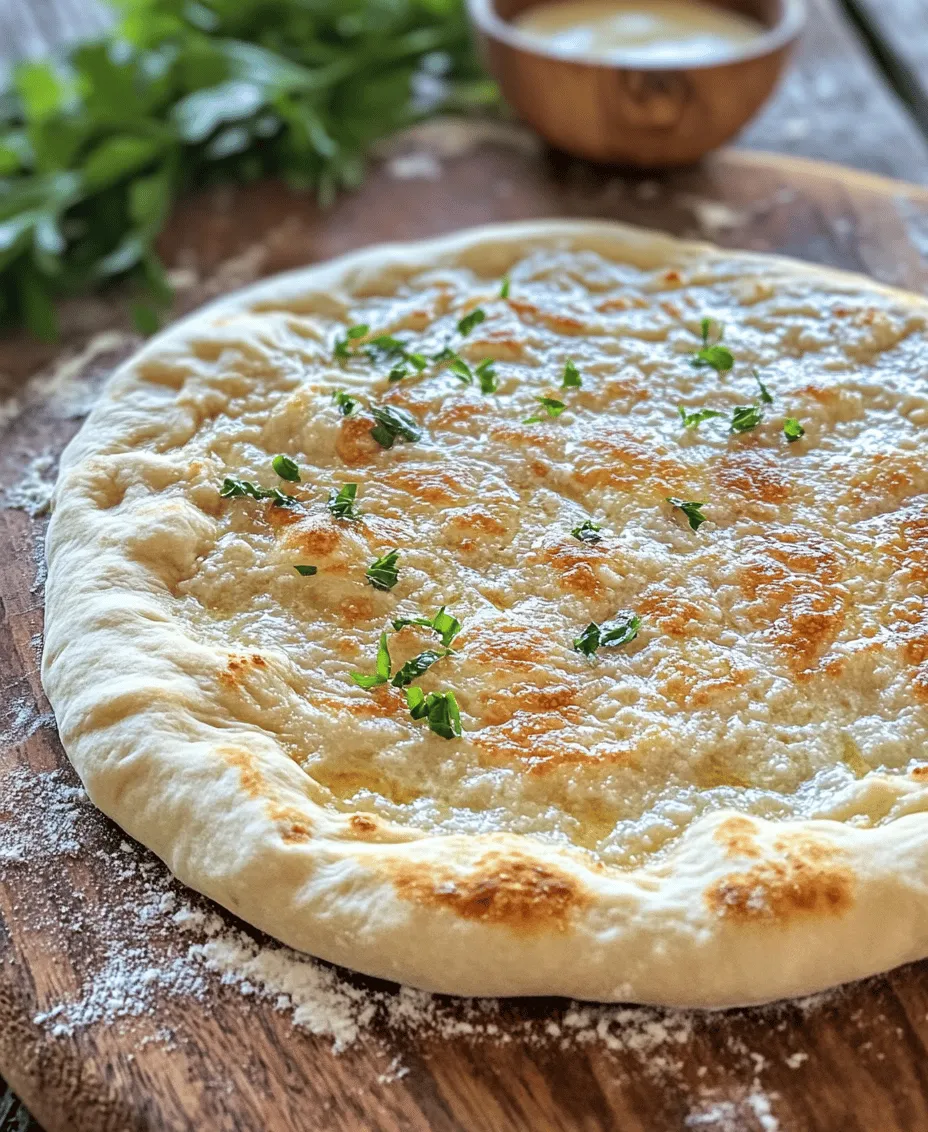
Adding Toppings and Baking
Now comes the fun part—topping your pizza! You can choose from a variety of toppings depending on your preference. Start with a base layer of sauce, whether it’s classic tomato, pesto, or a white garlic sauce. Then, sprinkle a generous layer of cheese. Mozzarella is a classic choice; however, feel free to mix it with provolone, fontina, or even goat cheese for a gourmet touch.
For additional toppings, consider a balance of flavors and textures—fresh vegetables, cured meats, or even fruits like figs or pear can elevate your pizza. A sprinkle of fresh herbs like basil or arugula can add freshness right before serving.
Transfer your prepared pizza to the oven (or onto the hot pizza stone) and bake for 10 to 15 minutes. Keep an eye on it; your pizza is done when the crust is golden brown, and the cheese is bubbly and slightly browned. If you’re using a baking sheet, you might want to rotate the pizza halfway through for even baking.
Tips for Perfecting Your Artisan Pizza Dough
As you embark on your pizza-making journey, keep these tips in mind to avoid common mistakes:
– Kneading Too Little: Proper gluten development is key. Ensure you knead long enough for the dough to become smooth and elastic.
– Skipping the Rises: Allowing the dough to rise is essential for flavor and texture. Don’t rush this process.
– Overworking the Dough: Be gentle when shaping to preserve air pockets. If the dough resists stretching, let it rest for a few minutes before continuing.
In terms of variations, consider experimenting with different types of flour. Whole wheat flour can add a nutty flavor and denser texture, while bread flour can enhance chewiness due to its higher protein content.
If you find yourself with leftover dough, you can store it in the refrigerator for up to 3 days. Just wrap it tightly in plastic wrap or place it in an airtight container. When you’re ready to use it, allow it to come to room temperature before shaping.
The Versatility of Artisan Pizza Dough
One of the greatest benefits of mastering artisan pizza dough is its versatility. Beyond traditional pizzas, you can create a variety of styles to suit different cravings. For example, try making a calzone by folding the dough over your favorite filling, or create a pizza bianca topped with ricotta, spinach, and a drizzle of olive oil.
Seasonal toppings can also inspire creativity in your pizza-making. In the summer, consider fresh tomatoes, basil, and mozzarella for a classic Caprese pizza. In the fall, roasted butternut squash, caramelized onions, and sage can make for a deliciously comforting dish.
Don’t forget about creative uses for leftover dough! It can be transformed into breadsticks, mini calzones, or even savory pastries. The possibilities are endless!
Conclusion
Mastering artisan pizza dough is an essential skill for any pizza enthusiast. With practice, attention to detail, and a willingness to experiment, you can create pizzas that rival those from your favorite pizzeria right in your home kitchen. Enjoy the process of creating, topping, and baking, and don’t be afraid to explore new flavors and techniques. The joy of making homemade pizza with loved ones is a rewarding experience that brings everyone together—one delicious slice at a time. So roll up your sleeves, gather your favorite ingredients, and embark on a culinary adventure that you and your family will cherish!